Using Two Factor Authentication for my Client Area
Print
- 13-08-2018 09:47
Crucial has implemented Two Factor Authentication (2FA) for use on the Crucial Client Area. This improves the security of the account login itself, by reducing the possibility of unauthorised access. This also improves the security of the Crucial Security PIN used for support verification. This was first launched in February 2015 and is opt-in, meaning you need to specifically enable it.
We've recently updated the way 2FA works on our Client Area, meaning some clients who have previously enabled 2FA will need to set it up again. We have a step-by-step guide on this process here:
How to update your Two Factor Authentication in the Crucial Client Area
Two Factor Authentication protects your account by adding another step of authentication when logging in. In the event that your password is compromised it will prevent someone from logging into your account with the password alone.
This is achieved by setting up a smartphone to display a code specific to your account that changes every 60 seconds. You are prompted for this code after you log in with your username and password.
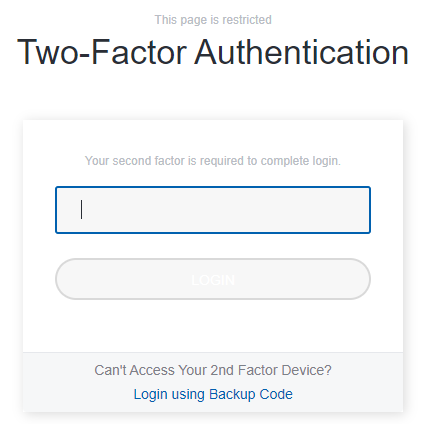
Once 2FA is enabled for your account, you will be prompted for a 6 digit code each time you log into your Client Area, after entering your username and password. To complete the login, you will need to access your 2FA app and enter the code.
Step 1 - Log into your Crucial Client Area.
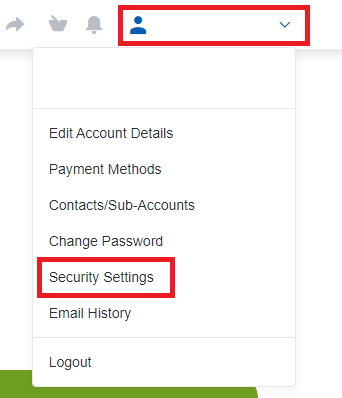
Step 2 - Click on your name in the top right of the Client Area, then select Security Settings from the dropdown list.
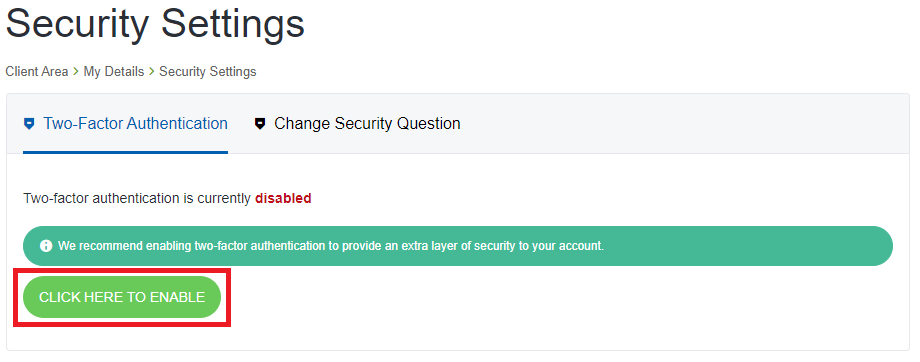
Step 3 - Set up the new 2FA module by selecting the Click Here to Enable button.
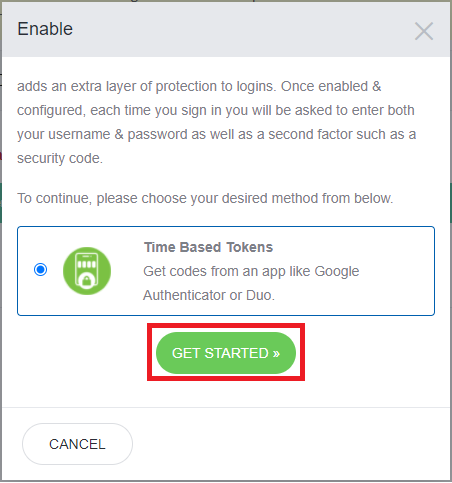
Step 4 - Select Get Started.
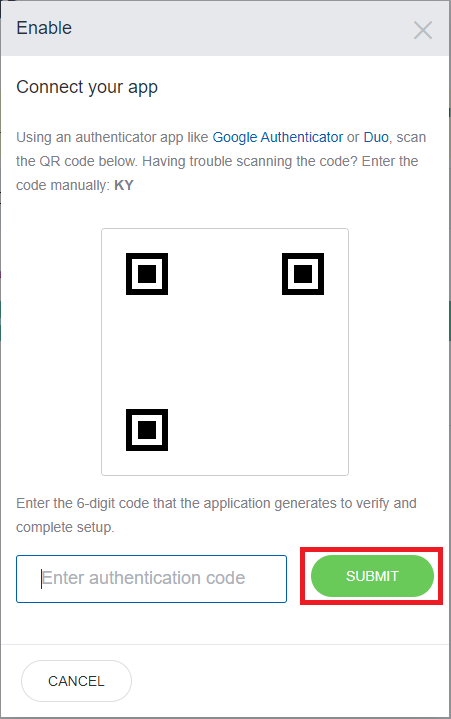
Step 5 - Open a compatible 2-Factor Authentication app and set up a new account using the barcode or the manual code. Enter in the code that the app generates and click Submit.
Some app options are below:
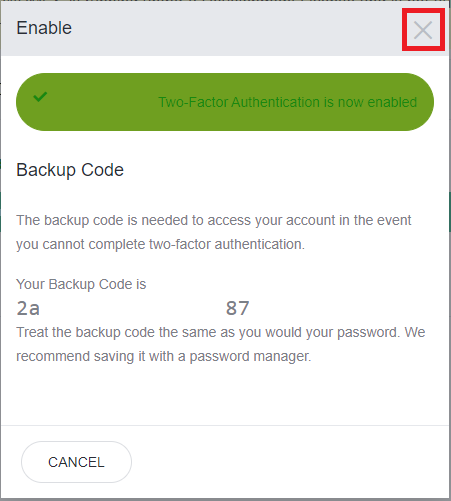
Step 6 - Take a note of your Backup Code, then exit the window. Make sure you save this in a safe location, as this is the only time it will be displayed.
Congratulations, you've now set up your Crucial 2 Factor Authentication and ensured you'll continue to be protected in future.
Step 1 - Log into your Client Area. If 2-Factor Authentication is currently enabled, you will have to use it to log in.
Step 2 - Click on your name in the top right of the Client Area, then select Security Settings from the dropdown list.

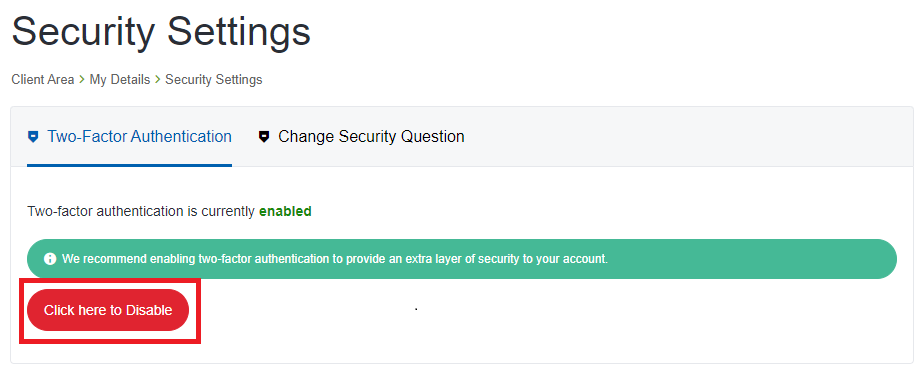
Step 3 - Select Click Here to Disable.
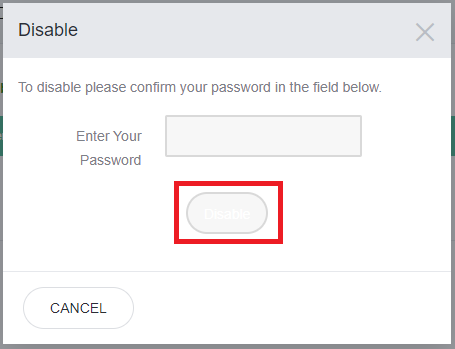
Step 4 - You will be prompted to enter your Client Area password again - do so, then click on Disable.
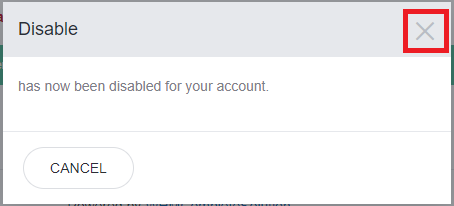
Step 5 - You will get a confirmation window advising 2FA has been disabled. Exit the window.
If you are unable to log in using the generated code, you can use the emergency code that was provided when enabling 2FA.
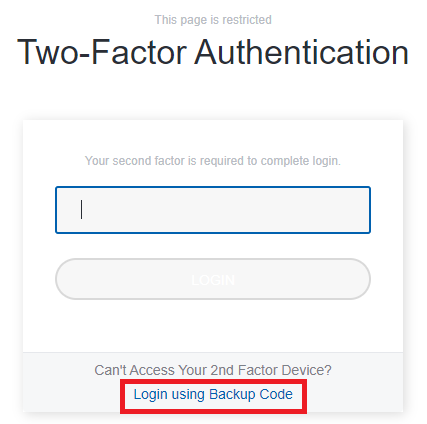
Step 1 - On the verification screen, click on the Login using Backup Code button.
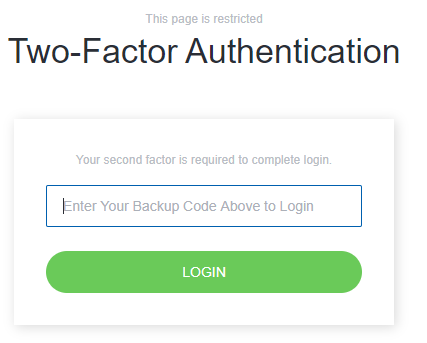
Step 2 - Enter in your emergency code in the text box, and click Login.
Step 3 - You will be logged in, and 2FA will be automatically disabled. You will need to re-enable this using the steps in this article if you wish to keep using 2FA.
We've recently updated the way 2FA works on our Client Area, meaning some clients who have previously enabled 2FA will need to set it up again. We have a step-by-step guide on this process here:
How to update your Two Factor Authentication in the Crucial Client Area
What is 2FA?
Two Factor Authentication protects your account by adding another step of authentication when logging in. In the event that your password is compromised it will prevent someone from logging into your account with the password alone.
This is achieved by setting up a smartphone to display a code specific to your account that changes every 60 seconds. You are prompted for this code after you log in with your username and password.
Using 2FA
Once 2FA is enabled for your account, you will be prompted for a 6 digit code each time you log into your Client Area, after entering your username and password. To complete the login, you will need to access your 2FA app and enter the code.
Enabling 2FA
Step 1 - Log into your Crucial Client Area.
Step 2 - Click on your name in the top right of the Client Area, then select Security Settings from the dropdown list.
Step 3 - Set up the new 2FA module by selecting the Click Here to Enable button.
Step 4 - Select Get Started.
Step 5 - Open a compatible 2-Factor Authentication app and set up a new account using the barcode or the manual code. Enter in the code that the app generates and click Submit.
Some app options are below:
- For Android™, iOS®, and Blackberry® — Google Authenticator™
- For Android and iOS — Duo Mobile
- For Windows® Phone — Authenticator
Step 6 - Take a note of your Backup Code, then exit the window. Make sure you save this in a safe location, as this is the only time it will be displayed.
Congratulations, you've now set up your Crucial 2 Factor Authentication and ensured you'll continue to be protected in future.
Disabling 2FA
Step 1 - Log into your Client Area. If 2-Factor Authentication is currently enabled, you will have to use it to log in.
Step 2 - Click on your name in the top right of the Client Area, then select Security Settings from the dropdown list.
Step 3 - Select Click Here to Disable.
Step 4 - You will be prompted to enter your Client Area password again - do so, then click on Disable.
Step 5 - You will get a confirmation window advising 2FA has been disabled. Exit the window.
Emergency Code
If you are unable to log in using the generated code, you can use the emergency code that was provided when enabling 2FA.
Step 1 - On the verification screen, click on the Login using Backup Code button.
Step 2 - Enter in your emergency code in the text box, and click Login.
Step 3 - You will be logged in, and 2FA will be automatically disabled. You will need to re-enable this using the steps in this article if you wish to keep using 2FA.
Related Articles
© Crucial