Email Setup for iPhone / iPad
Print
Before you start:
A) Make sure you know the correct email settings for your account. You can find these here.
B) If you don't have your email password, you can find it here.
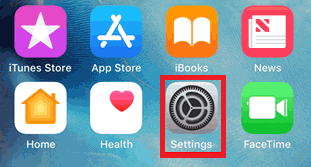
Step 1 - Click on Settings.
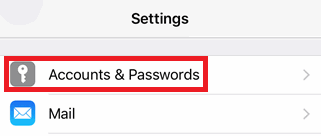
Step 2 - Click on Accounts and Passwords.
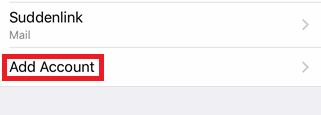
Step 3 - Click on Add Account.
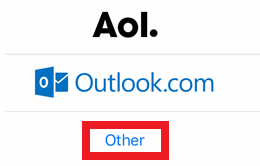
Step 4 - Select Other.
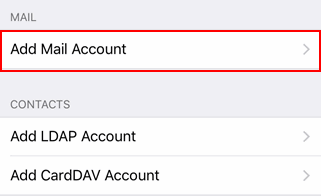
Step 5 - Select Add Mail Account.
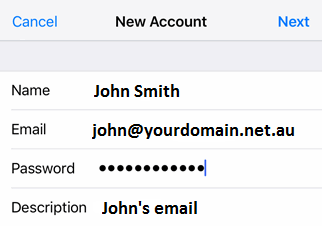
Step 6 - Add your personal details.
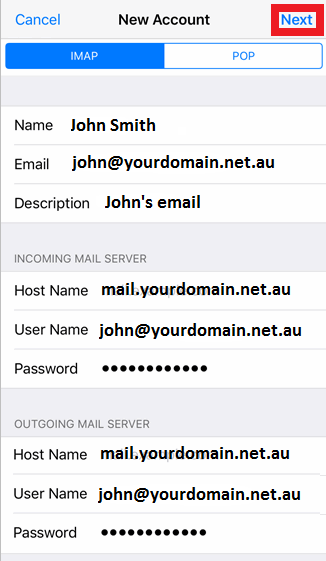
Step 7 - Add your mail settings. Click Next to complete the setup.
Note: The User Name and Password for Outgoing Mail Server are NOT optional and must be entered.
Step 8 - Test the email account by sending an email from / to your email address (e.g. from john@yourdomain.net.au to john@yourdomain.net.au). If this device can receive mail, the incoming server settings are correct. If the device can send mail, the outgoing server settings are correct as well.
For more tutorials on accessing emails and setting up email clients, view our Email Setup Guides.
- 24-07-2020 17:52
Email Setup for iPhone / iPad
Before you start:
A) Make sure you know the correct email settings for your account. You can find these here.
B) If you don't have your email password, you can find it here.
Step 1 - Click on Settings.
Step 2 - Click on Accounts and Passwords.
Step 3 - Click on Add Account.
Step 4 - Select Other.
Step 5 - Select Add Mail Account.
Step 6 - Add your personal details.
Step 7 - Add your mail settings. Click Next to complete the setup.
Note: The User Name and Password for Outgoing Mail Server are NOT optional and must be entered.
Step 8 - Test the email account by sending an email from / to your email address (e.g. from john@yourdomain.net.au to john@yourdomain.net.au). If this device can receive mail, the incoming server settings are correct. If the device can send mail, the outgoing server settings are correct as well.
For more tutorials on accessing emails and setting up email clients, view our Email Setup Guides.
Thank you for your feedback on this article.
Related Articles
© Crucial