WordPress - How to Install using Softaculous
Print
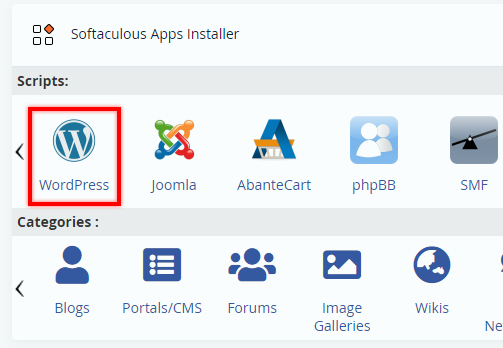
Step 1 - Log into cPanel and click on the WordPress icon under Softaculous Apps Installer.
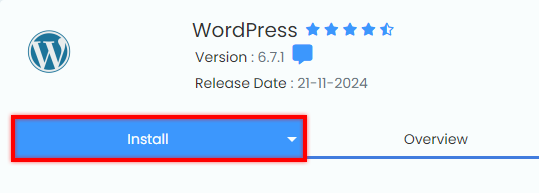
Step 2 - Click Install.
Step 3 - Set your Protocol, Domain and In Directory:
Choose Protocol: If you're not sure you should select ' https:// ', or ' https://www. ' if you would like the visitor to see www in the address bar. It can also be changed later from the WordPress dashboard.
Choose Domain: Select the domain you wish to install WordPress to. You can also select subdomains or add-on domains you have added within cPanel.
In Directory: Leave this default/blank unless you're installing WordPress in a sub folder, e.g. yourdomain.net.au/testsite/.

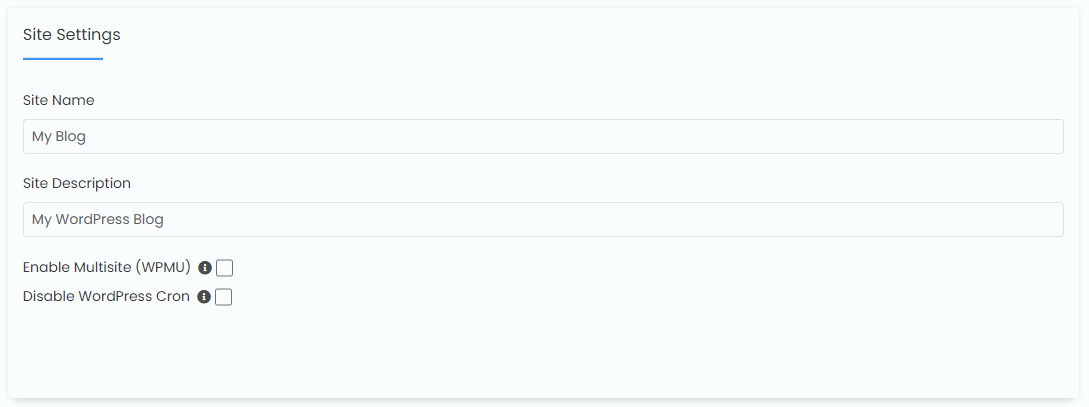
Step 4 - Set the Name and a short description of the site. This can be changed at a later date.
Note: WordPress Multisite (WPMU) is a feature used if you're creating a large network of sites/blogs with the same WordPress database. Unless you know what you're doing, leave the box unticked.
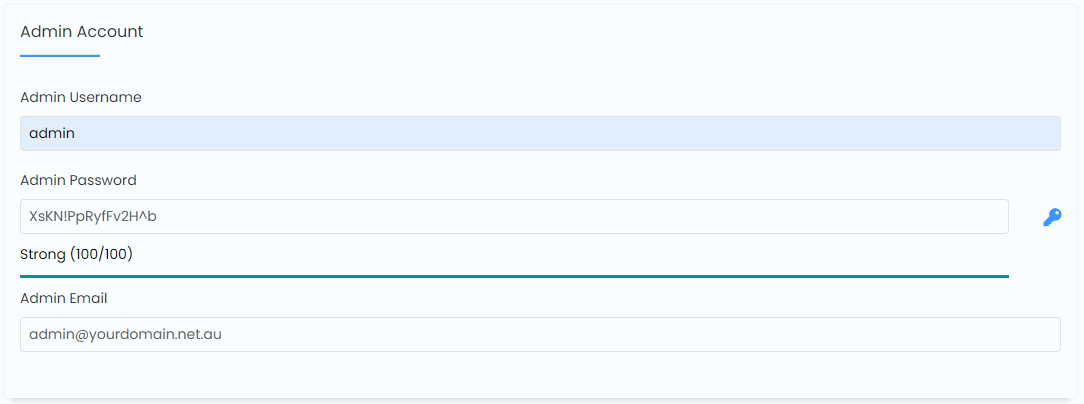
Step 5 - Set your Admin Username, Password, Name and Email:
Admin Username: The default username 'admin' will be most targeted in brute force attacks, so it is recommended to modify this.
Admin Password: Make sure your password is unique, and that it has a high strength to reduce the likelihood of your WordPress install being compromised.
Admin Email: Set this to your main email. It will be used if you need to reset your WordPress password and get important notifications.
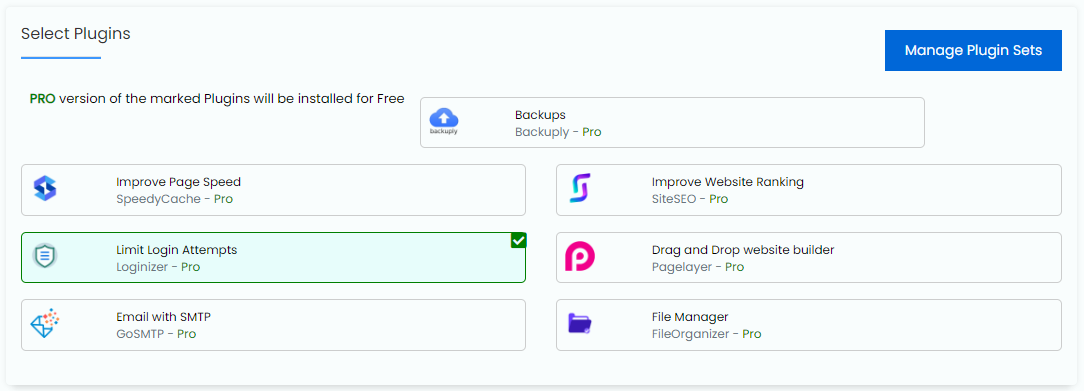
Step 6 - Here you can enable some plugins to be automatically installed. To protect your WordPress site against Brute Force attacks, we would recommend that you select Loginizer. You can of course leave it unticked and install it or another WordPress security plugin at a later date to increase your security.
Step 7 - If you're not sure, you should leave the Advanced Options as default. Lastly, enter your email address and click Install. We recommend using your primary email address, as important WordPress information will be sent once the install completes.

For more tutorials on website development and WordPress troubleshooting, view our List of WordPress Guides.
- 23-03-2018 17:28
Install WordPress using Softaculous
Step 1 - Log into cPanel and click on the WordPress icon under Softaculous Apps Installer.
Step 2 - Click Install.
Step 3 - Set your Protocol, Domain and In Directory:
Choose Protocol: If you're not sure you should select ' https:// ', or ' https://www. ' if you would like the visitor to see www in the address bar. It can also be changed later from the WordPress dashboard.
Choose Domain: Select the domain you wish to install WordPress to. You can also select subdomains or add-on domains you have added within cPanel.
In Directory: Leave this default/blank unless you're installing WordPress in a sub folder, e.g. yourdomain.net.au/testsite/.
Step 4 - Set the Name and a short description of the site. This can be changed at a later date.
Note: WordPress Multisite (WPMU) is a feature used if you're creating a large network of sites/blogs with the same WordPress database. Unless you know what you're doing, leave the box unticked.
Step 5 - Set your Admin Username, Password, Name and Email:
Admin Username: The default username 'admin' will be most targeted in brute force attacks, so it is recommended to modify this.
Admin Password: Make sure your password is unique, and that it has a high strength to reduce the likelihood of your WordPress install being compromised.
Admin Email: Set this to your main email. It will be used if you need to reset your WordPress password and get important notifications.
Step 6 - Here you can enable some plugins to be automatically installed. To protect your WordPress site against Brute Force attacks, we would recommend that you select Loginizer. You can of course leave it unticked and install it or another WordPress security plugin at a later date to increase your security.
Step 7 - If you're not sure, you should leave the Advanced Options as default. Lastly, enter your email address and click Install. We recommend using your primary email address, as important WordPress information will be sent once the install completes.
For more tutorials on website development and WordPress troubleshooting, view our List of WordPress Guides.
Thank you for your feedback on this article.
Related Articles
© Crucial