Install Litespeed Cache for WordPress
Print
If you're on a Web Hosting or Reseller Hosting plan, your service includes Litespeed, much faster replacement for Apache. With Litespeed, you can use the plugin for WordPress which works far better than Super Cache, Total Cache or other cache plugins can, as it runs on the server level rather than just the WordPress level.
If you have a Managed VPS Server, feel free to submit a support ticket through here and we can install Litespeed for you. There is a monthly cost with Litespeed (as it's a commercial product) which depends on your server specifications. For the performance benefit (even if you're not using WordPress), Litespeed is definitely worth the cost.
Step 1 - Log in to WordPress and add a new plugin

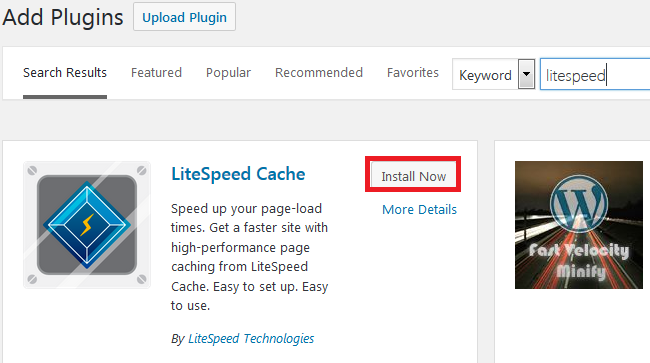
Step 2 - Find the plugin and click Install Now
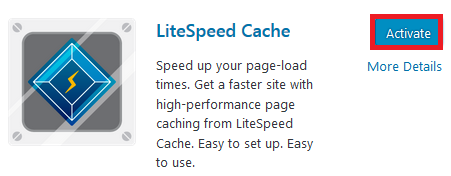
Click Activate to enable Litespeed
Step 3 - Next, you need to log in to cPanel and edit your .htaccess file (click here for a guide) to remove the default config.
One: Delete this text
Two: Add this text to the top
The page should look like this.
Hit Save. Litespeed Cache is now installed and Working :)
How to Install Litespeed Cache for WordPress
If you're on a Web Hosting or Reseller Hosting plan, your service includes Litespeed, much faster replacement for Apache. With Litespeed, you can use the plugin for WordPress which works far better than Super Cache, Total Cache or other cache plugins can, as it runs on the server level rather than just the WordPress level.
If you have a Managed VPS Server, feel free to submit a support ticket through here and we can install Litespeed for you. There is a monthly cost with Litespeed (as it's a commercial product) which depends on your server specifications. For the performance benefit (even if you're not using WordPress), Litespeed is definitely worth the cost.
Step 1 - Log in to WordPress and add a new plugin
Step 2 - Find the plugin and click Install Now
Click Activate to enable Litespeed
Step 3 - Next, you need to log in to cPanel and edit your .htaccess file (click here for a guide) to remove the default config.
One: Delete this text
## LITESPEED WP CACHE PLUGIN - Do not edit the contents of this block! ##
<IfModule LiteSpeed>
RewriteEngine on
CacheLookup on
RewriteRule .* - [E=Cache-Control:no-autoflush]
RewriteRule min/\w+\.(css|js) - [E=cache-control:no-vary]
### marker CACHE RESOURCE start ###
RewriteRule wp-content/.*/[^/]*(responsive|css|js|dynamic|loader|fonts)\.php - [E=cache-control:max-age=3600]
### marker CACHE RESOURCE end ###
### marker FAVICON start ###
RewriteRule favicon\.ico$ - [E=cache-control:max-age=86400]
### marker FAVICON end ###
</IfModule>
## LITESPEED WP CACHE PLUGIN - Do not edit the contents of this block! ##
# END LSCACHE
# BEGIN NON_LSCACHE
## LITESPEED WP CACHE PLUGIN - Do not edit the contents of this block! ##
## LITESPEED WP CACHE PLUGIN - Do not edit the contents of this block! ##
# END NON_LSCACHE
Two: Add this text to the top
# BEGIN LSCACHE
<IfModule LiteSpeed>
CacheEnable public /
RewriteEngine on
RewriteCond %{REQUEST_METHOD} ^(HEAD|GET)$
RewriteCond %{REQUEST_URI} !^/(wp-admin|wp-login.php|wp-cron.php)
RewriteRule .* - [E=Cache-Control:max-age=120]
</IfModule>
# END NON_LSCACHE
The page should look like this.
# BEGIN LSCACHE
<IfModule LiteSpeed>
CacheEnable public /
RewriteEngine on
RewriteCond %{REQUEST_METHOD} ^(HEAD|GET)$
RewriteCond %{REQUEST_URI} !^/(wp-admin|wp-login.php|wp-cron.php)
RewriteRule .* - [E=Cache-Control:max-age=120]
</IfModule>
# END NON_LSCACHE
# BEGIN WordPress
<IfModule mod_rewrite.c>
RewriteEngine On
RewriteBase /
RewriteRule ^index\.php$ - [L]
RewriteCond %{REQUEST_FILENAME} !-f
RewriteCond %{REQUEST_FILENAME} !-d
RewriteRule . /index.php [L]
</IfModule>
# END WordPress
Hit Save. Litespeed Cache is now installed and Working :)
Thank you for your feedback on this article.
Related Articles
© Crucial