Install Google reCAPTCHA in WordPress
Print
This guide involves:
A) Signing up for Google reCAPTCHA
B) Enabling the appropriate reCAPTCHA plugin.
Step 1 - You will need to have a Google account and be signed into it (in a separate window). If you don't have a Google account, you can make one for free from gmail.com Once that's done, go to https://www.google.com/recaptcha/admin
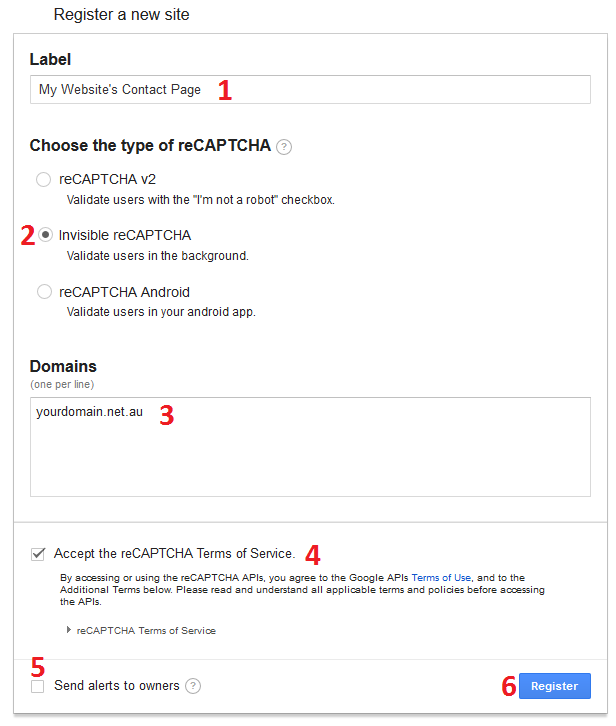
Step 2 - (1) Add a label, can be anything (2) Select Invisible reCAPTCHA (3) add your domain name (4) read and accept the terms of service (5) untick the send alerts box (6) click Register
Step 3 - On the next page, you'll see the Site key and Secret Key. Make sure these keys are saved somewhere.

Add reCAPTCHA for Contact Form 7
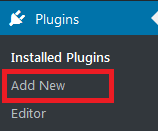
Step 1 - Log in to WordPress and add a new plugin (if you've forgotten your WordPress login password, click here for a guide on resetting it)
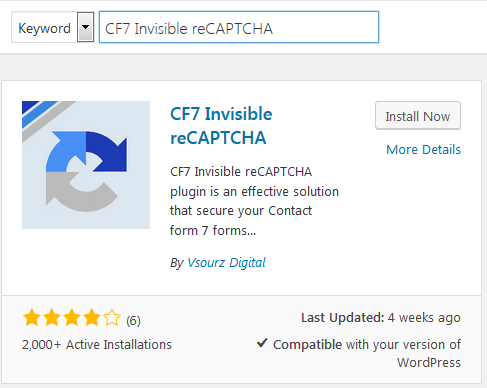
Step 2 - Find and install the CF7 Invisible reCAPTCHA plugin
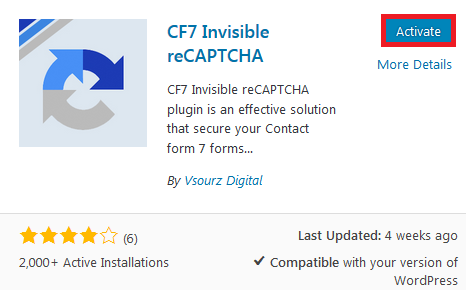
Then click Activate once it's installed
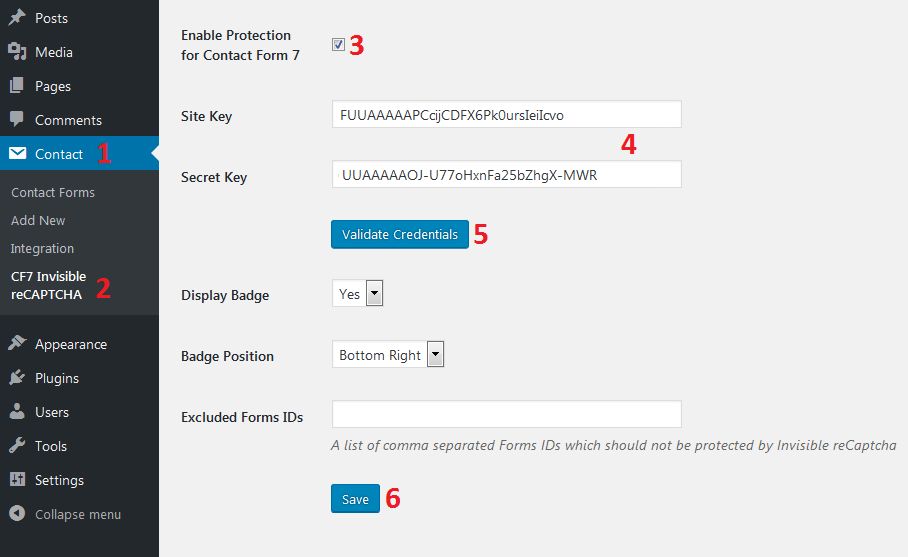
Step 3 - (1) Click Contact (2) Click CF7 Invisisble reCAPTCHA (3) Click Enable Protection for Contact Form 7 (4) Add the Site Key and Secret Key from the Google page (keys in the image bellow are just an example) (5) Click Validate Credentials (6) Click Save
- 21-08-2018 14:12
How to Install Google reCAPTCHA in WordPress
NOTE: We provide this guide for information purposes only. As we're not web developers/WordPress professionals ourselves (we primarily take care of Email and Hosting Infrastructure), our support team can't provide assistance with this or other WordPress specific issue. If you're uncomfortalbe with configuring WordPress plugins, please have your WordPress developer or a WordPress professional complete this for you.This guide involves:
A) Signing up for Google reCAPTCHA
B) Enabling the appropriate reCAPTCHA plugin.
Sign Up for Google recaptcha
Step 1 - You will need to have a Google account and be signed into it (in a separate window). If you don't have a Google account, you can make one for free from gmail.com Once that's done, go to https://www.google.com/recaptcha/admin
Step 2 - (1) Add a label, can be anything (2) Select Invisible reCAPTCHA (3) add your domain name (4) read and accept the terms of service (5) untick the send alerts box (6) click Register
Step 3 - On the next page, you'll see the Site key and Secret Key. Make sure these keys are saved somewhere.
Add reCAPTCHA for Contact Form 7
Step 1 - Log in to WordPress and add a new plugin (if you've forgotten your WordPress login password, click here for a guide on resetting it)
Step 2 - Find and install the CF7 Invisible reCAPTCHA plugin
Then click Activate once it's installed
Step 3 - (1) Click Contact (2) Click CF7 Invisisble reCAPTCHA (3) Click Enable Protection for Contact Form 7 (4) Add the Site Key and Secret Key from the Google page (keys in the image bellow are just an example) (5) Click Validate Credentials (6) Click Save
Related Articles
© Crucial