How to Restore an Email Account that was Deleted in cPanel
Print
If you would like our support team to do this for you, submit a support ticket through https://control.crucial.com.au/ and let us know which email account to restore, and if possible, it's password. A $40 charge will apply to do this for Business / Web hosting and Reseller plans, as well as servers without Management.
Note: This process uses our automated backups, which go back 7 days. On Personal, Business, Premium and Reseller plans, the backups can be accessed from the R1soft icon in cPanel. For Managed VPS plans, complete Step 1 then send a support ticket through https://control.crucial.com.au/ and we'll restore the account for you, as backups are only accessible by us. For Self Managed VPS, Control Panel or Blaze services, you should have login information for the Idera backup software, but if your server is managed you can send us a support ticket to do this for you.
First, Create the email account again. Make sure the name is spelt exactly the same. If possible, use the same password.
Click here for our guide to make the email account in cPanel
Note : If the email account was set up on a device as POP, the emails may have been downloaded onto the device and deleted from the server (as that's how POP normally works), meaning the emails may not have been backed up.
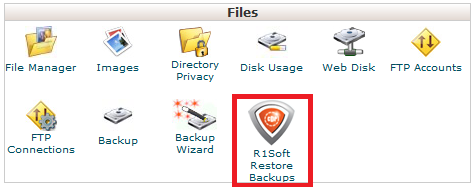
Step 1 - Click on the R1Soft Restore Backups icon (or, for VPS Plans, log into R1soft as you would normally).
Step 2 - Click on the orange folder icon to the right of the restore point you want to restore from

Step 3 - Double click on Home

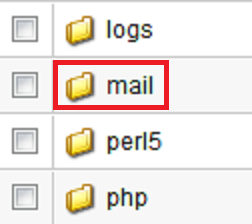
Step 4 - Double click on mail
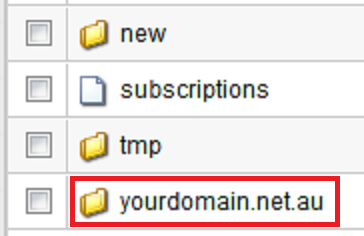
Step 5 - Double click on the domain name listed (should only show your primary domain)

Step 6 - Double click on the domain name for the email account that you want to be restored
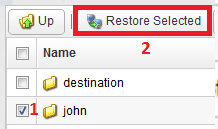
Step 7 - Tick the box for the user/email account you want to be restored and hit Restore Selected
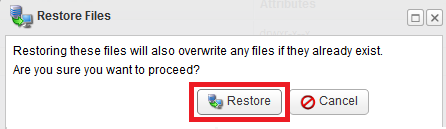
Step 8 - Click Restore to confirm you want the restore to begin
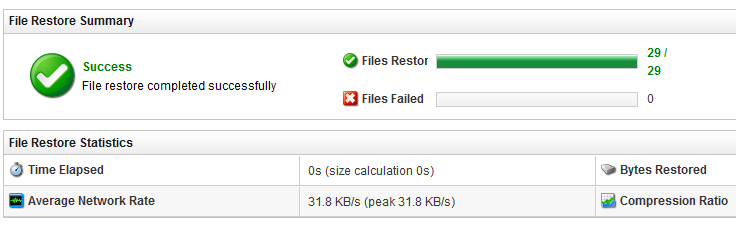
Step 9 - Once the restore is complete, you'll see a screen that looks like this
If your email account is set up on an email program like your phone or Outlook, either hit the Send/Receive all emails menu (most email clients should have a similar option) or wait a few minutes as some email clients are on a 15min timer where they check for new emails automatically.
How to Restore an Email Account that was Deleted in cPanel
If you would like our support team to do this for you, submit a support ticket through https://control.crucial.com.au/ and let us know which email account to restore, and if possible, it's password. A $40 charge will apply to do this for Business / Web hosting and Reseller plans, as well as servers without Management.
Note: This process uses our automated backups, which go back 7 days. On Personal, Business, Premium and Reseller plans, the backups can be accessed from the R1soft icon in cPanel. For Managed VPS plans, complete Step 1 then send a support ticket through https://control.crucial.com.au/ and we'll restore the account for you, as backups are only accessible by us. For Self Managed VPS, Control Panel or Blaze services, you should have login information for the Idera backup software, but if your server is managed you can send us a support ticket to do this for you.
First, Create the email account again. Make sure the name is spelt exactly the same. If possible, use the same password.
Click here for our guide to make the email account in cPanel
Note : If the email account was set up on a device as POP, the emails may have been downloaded onto the device and deleted from the server (as that's how POP normally works), meaning the emails may not have been backed up.
Step 1 - Click on the R1Soft Restore Backups icon (or, for VPS Plans, log into R1soft as you would normally).
Step 2 - Click on the orange folder icon to the right of the restore point you want to restore from
Step 3 - Double click on Home
Step 4 - Double click on mail
Step 5 - Double click on the domain name listed (should only show your primary domain)
Step 6 - Double click on the domain name for the email account that you want to be restored
Step 7 - Tick the box for the user/email account you want to be restored and hit Restore Selected
Step 8 - Click Restore to confirm you want the restore to begin
Step 9 - Once the restore is complete, you'll see a screen that looks like this
If your email account is set up on an email program like your phone or Outlook, either hit the Send/Receive all emails menu (most email clients should have a similar option) or wait a few minutes as some email clients are on a 15min timer where they check for new emails automatically.
Related Articles
© Crucial