DNS - Add and Edit DNS Records ( CNAME MX A TXT SRV Record)
Print
Note 1: DNS changes don't update instantly. As the changes need to be picked up by servers around the world that only check for updates occasionally, they can take anywhere from 5 minutes to 24 hours to update.
You can use a site like dnschecker.org or testlocal.ly to check when the record / website changes have become live.
Note 2: If you have been asked to add a record with @ as the name, type in your full domain name (e.g. yourdomain.com.au).
Note 3: When adding new records, check if there is a default record with the same name and record type. If so, delete or edit the default record to avoid conflicts.
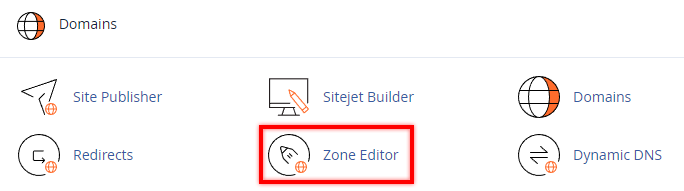
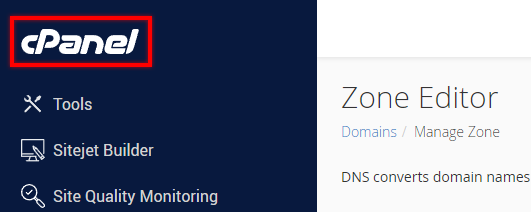
Step 1 - Log into cPanel and click on the Zone Editor tool.
Step 2 - From this Zone Editor, click on Manage for the domain in question.

Step 1 - From the Zone Editor, Click Delete next to the record in question.

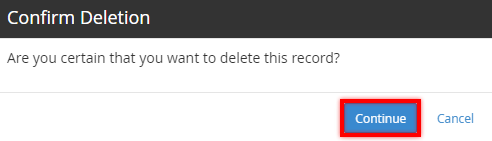
Step 2 - Select Continue on the pop-up box.
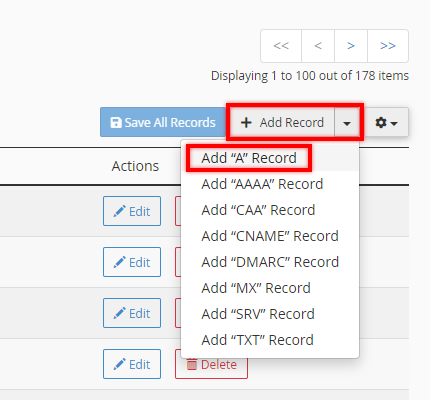
Step 1 - From the Zone Editor, click on the dropdown list next to + Add Record. Next, click Add A Record.
Step 2 - Enter in the zone name (domain) and the record (IP address), then select Save Record.

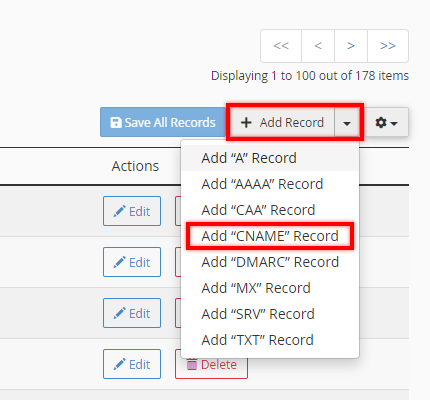
Step 1 - From the Zone Editor, click on the dropdown list next to + Add Record. Next, click Add CNAME Record.
Step 2 - Enter in the Zone name and the Record (fully qualified domain name), then select Add Record.

Step 1 - From the Zone Editor, filter for MX so only the MX records are listed to prevent any conflicts.

Step 2 - If you see any old MX records, delete (or edit) them before adding the new records to prevent any conflicts.

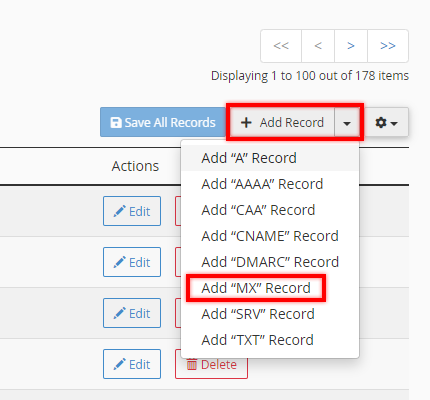
Step 3 - Click on the dropdown list next to + Add Record. Next, click on Add MX Record.
Step 4 - Enter the Zone Name (If you were given "@", use your domain name), Priority, and the Record and click Add Record.

Click on the cPanel logo in the top left of the screen.
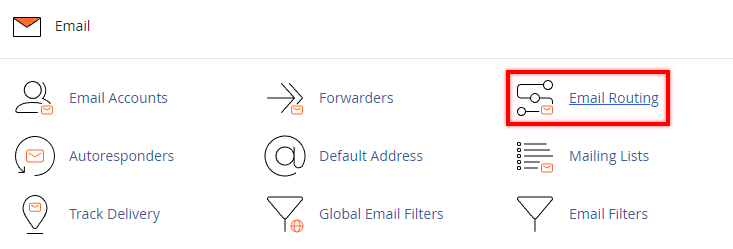
Now click on the Email Routing icon.
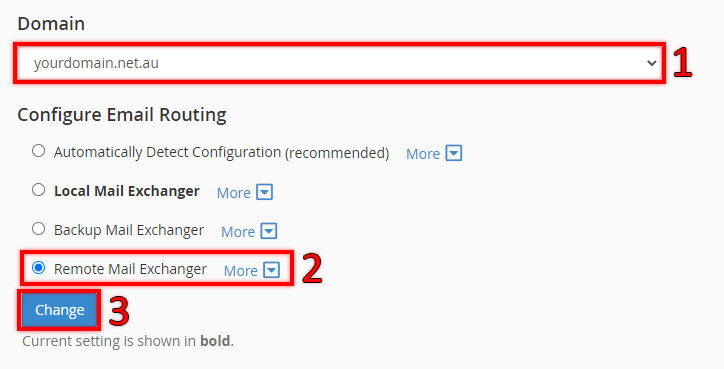
Step 5 - (1) select your domain (2) select Remote Mail Exchanger (3) Click on Change.
Note: If you are changing the MX records to use this cPanel account for your mail, you would instead change the email routing to Local.
Note: If you have to add an SPF, DKIM or DMARC record, you can alternatively follow this guide.
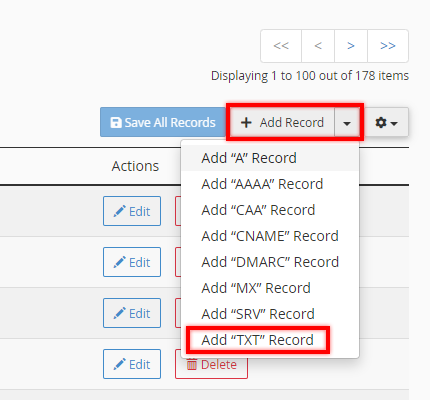
Step 1 - From the Zone Editor, click Add Record then select Add TXT Record.
Step 2 - Add the Zone Name and the Record in, then click Add Record.

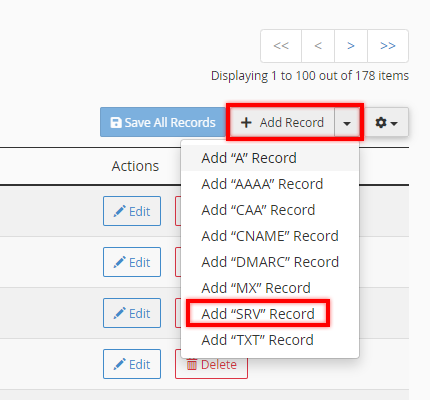
Step 1 - From the Zone Editor, click Add Record then select Add SRV Record.
Step 2 - Enter in the Zone name and the Record (IP address), then select Add Record.
Note: If you're asked to add a protocol, you have to combine it with the Name (sometimes called service). In the below picture, _tls is the protocol and it's being added to _sip.yourdomain.net.au.

How to Manage and Edit DNS Records (A, CNAME, MX, TXT, etc records) with the cPanel Zone Editor
Note 1: DNS changes don't update instantly. As the changes need to be picked up by servers around the world that only check for updates occasionally, they can take anywhere from 5 minutes to 24 hours to update.
You can use a site like dnschecker.org or testlocal.ly to check when the record / website changes have become live.
Note 2: If you have been asked to add a record with @ as the name, type in your full domain name (e.g. yourdomain.com.au).
Note 3: When adding new records, check if there is a default record with the same name and record type. If so, delete or edit the default record to avoid conflicts.
How to Access the DNS Zone Editor
Step 1 - Log into cPanel and click on the Zone Editor tool.
Step 2 - From this Zone Editor, click on Manage for the domain in question.
How to Delete a DNS Record
Step 1 - From the Zone Editor, Click Delete next to the record in question.
Step 2 - Select Continue on the pop-up box.
How to Add an A Record
Step 1 - From the Zone Editor, click on the dropdown list next to + Add Record. Next, click Add A Record.
Step 2 - Enter in the zone name (domain) and the record (IP address), then select Save Record.
How to Add a CNAME Record
Step 1 - From the Zone Editor, click on the dropdown list next to + Add Record. Next, click Add CNAME Record.
Step 2 - Enter in the Zone name and the Record (fully qualified domain name), then select Add Record.
How to Add a MX Record
Step 1 - From the Zone Editor, filter for MX so only the MX records are listed to prevent any conflicts.
Step 2 - If you see any old MX records, delete (or edit) them before adding the new records to prevent any conflicts.
Step 3 - Click on the dropdown list next to + Add Record. Next, click on Add MX Record.
Step 4 - Enter the Zone Name (If you were given "@", use your domain name), Priority, and the Record and click Add Record.
Click on the cPanel logo in the top left of the screen.
Now click on the Email Routing icon.
Step 5 - (1) select your domain (2) select Remote Mail Exchanger (3) Click on Change.
Note: If you are changing the MX records to use this cPanel account for your mail, you would instead change the email routing to Local.
How to Add a TXT record
Note: If you have to add an SPF, DKIM or DMARC record, you can alternatively follow this guide.
Step 1 - From the Zone Editor, click Add Record then select Add TXT Record.
Step 2 - Add the Zone Name and the Record in, then click Add Record.
How to Add a SRV Record
Step 1 - From the Zone Editor, click Add Record then select Add SRV Record.
Step 2 - Enter in the Zone name and the Record (IP address), then select Add Record.
Note: If you're asked to add a protocol, you have to combine it with the Name (sometimes called service). In the below picture, _tls is the protocol and it's being added to _sip.yourdomain.net.au.
Thank you for your feedback on this article.
Related Articles
© Crucial