Create, Terminate, List or Modify a cPanel account in WHM
Print
Create a cPanel account in WHM
Step 1 - Log in to WHM
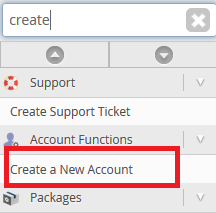
Step 2 - Find the Create a New Account option
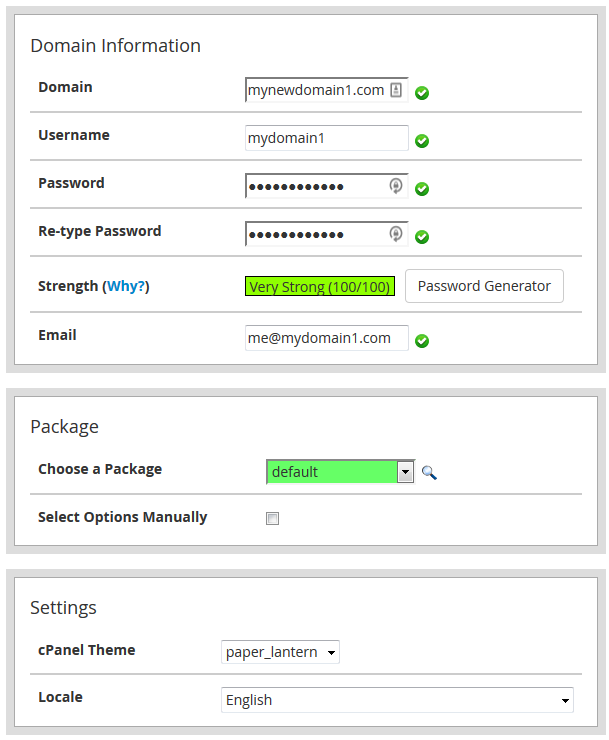
Step 3 - Add the Domain Information, select the Package and other Settings then click create.
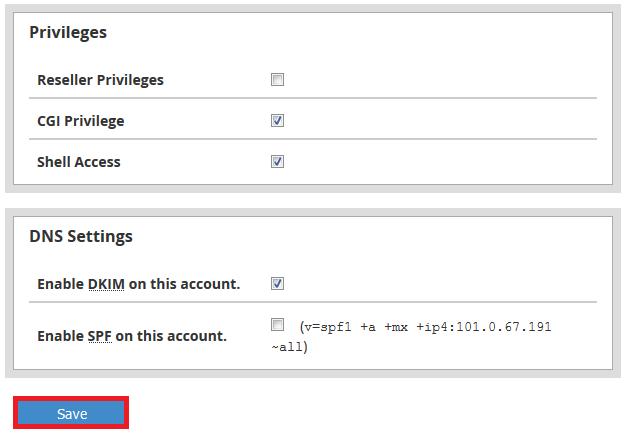
Note 1: If you're unsure, you can leave most options as the default already on there. Just make sure to tick Enable DKIM and Enable SPF under DNS Settings
Note 2: On a reseller plan, you may not see all of these options as some only appear on VPS and Dedicated Server plans (As they have root access)

Terminate an Account in WHM
Warning: Once an account is terminated, all data is lost and deleted. If you do this accidentaly, we may be able to restore from backup if it's within 7 days. This can take some time to do. We recommend calling us on 1300 694 678 to have this done urgently. Please note that charges may apply in this case. We highly recommend making and downloading full website backups using the cPanel Backup Wizard prior to terminating an account.
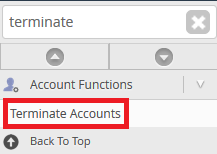
Step 1 - Find the Terminate Accounts option
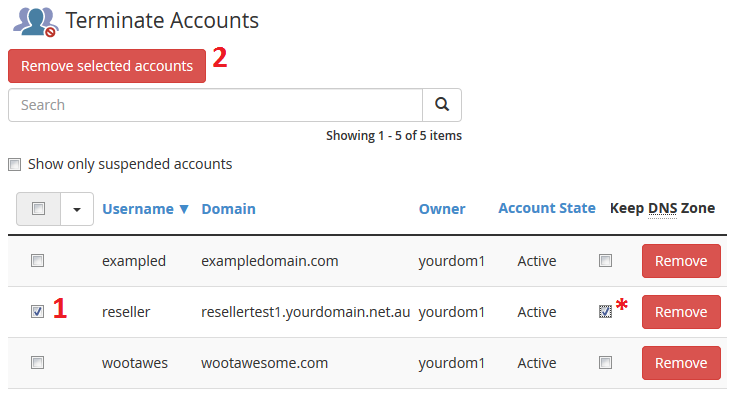
Step 2 - (1) Select the account/accounts you want to terminate (2) Click Remove selected accounts (*) You may or may not want to remove the DNS Zone. If the domain's nameservers have changed and or the site/service is being shut down completely, tick the Keep DNS Zone option. Otherwise, leave it unticked.
List all cPanel accounts on your server
To do this, just find t
List all cPanel accounts in WHM
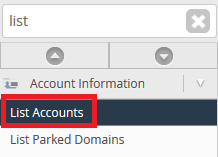
To list all accounts, just find and click on the List Accounts option in WHM
Modify a cPanel account in WHM
NOTE: This feature is only available to VPS and Dedicated Server customers as the feature requires Root level access
Step 1 - Go into the List accounts menu in cPanel

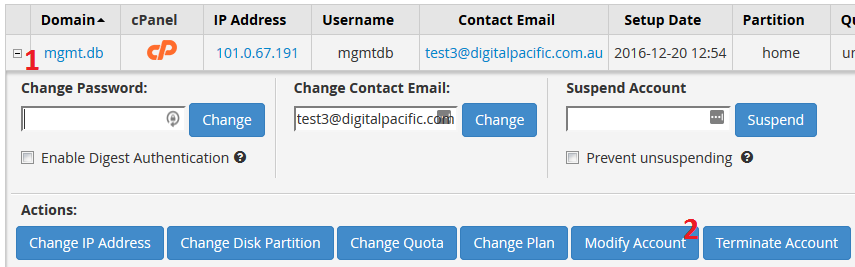
Step 2 - (1) Open the menu for the account you want to modify then (2) click the Modify Account option
Step 3 - Here are some of the settings you can change:
Primary Domain
Username
Account Owner
Contact Email
Default Local (Language)
cPanel THeme
Package
Disk Quota
Monthly Bandidth Limit
Step 4 - Click Save to apply the changes
- 20-08-2018 19:53
Create, Terminate, List or Modify a cPanel account in WHM
Create a cPanel account in WHM
Step 1 - Log in to WHM
Step 2 - Find the Create a New Account option
Step 3 - Add the Domain Information, select the Package and other Settings then click create.
Note 1: If you're unsure, you can leave most options as the default already on there. Just make sure to tick Enable DKIM and Enable SPF under DNS Settings
Note 2: On a reseller plan, you may not see all of these options as some only appear on VPS and Dedicated Server plans (As they have root access)
Terminate an Account in WHM
Warning: Once an account is terminated, all data is lost and deleted. If you do this accidentaly, we may be able to restore from backup if it's within 7 days. This can take some time to do. We recommend calling us on 1300 694 678 to have this done urgently. Please note that charges may apply in this case. We highly recommend making and downloading full website backups using the cPanel Backup Wizard prior to terminating an account.
Step 1 - Find the Terminate Accounts option
Step 2 - (1) Select the account/accounts you want to terminate (2) Click Remove selected accounts (*) You may or may not want to remove the DNS Zone. If the domain's nameservers have changed and or the site/service is being shut down completely, tick the Keep DNS Zone option. Otherwise, leave it unticked.
List all cPanel accounts on your server
To do this, just find tList all cPanel accounts in WHM
To list all accounts, just find and click on the List Accounts option in WHM
Modify a cPanel account in WHM
NOTE: This feature is only available to VPS and Dedicated Server customers as the feature requires Root level accessStep 1 - Go into the List accounts menu in cPanel
Step 2 - (1) Open the menu for the account you want to modify then (2) click the Modify Account option
Step 3 - Here are some of the settings you can change:
Primary Domain
Username
Account Owner
Contact Email
Default Local (Language)
cPanel THeme
Package
Disk Quota
Monthly Bandidth Limit
Step 4 - Click Save to apply the changes
Related Articles
© Crucial